
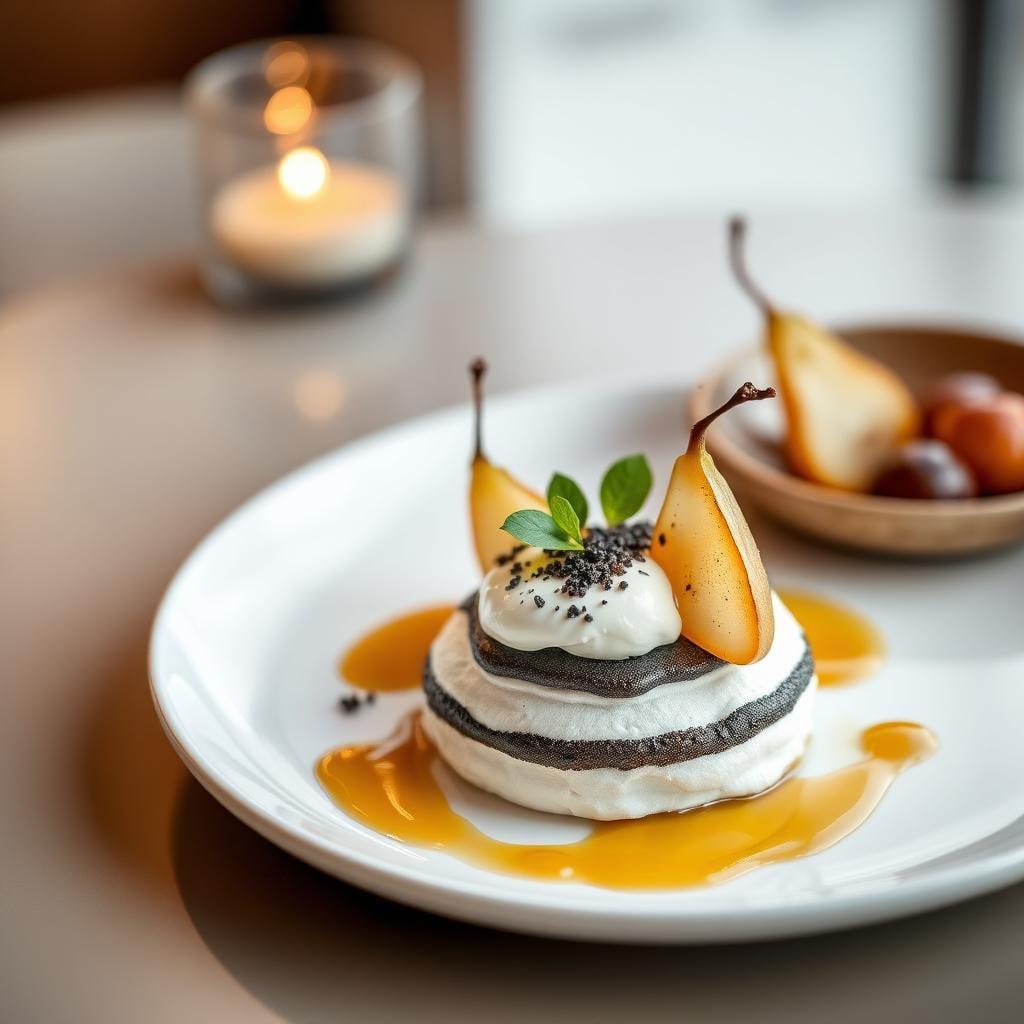
Black Sesame Pavlova with Cardamom-Poached Pears and Vanilla Bean Mascarpone
45min
2h
10
420
Chef's Note
The key to a perfect pavlova is ensuring your mixing bowl and beaters are completely free of any grease or egg yolk. Even a tiny amount can prevent the egg whites from whipping properly. For an extra touch of elegance, you can torch the edges of the pears lightly before placing them on the pavlova for a subtle caramelized flavor.
Tags
Ingredients
6 large egg whites
1/4 tsp cream of tartar
1 1/2 cups granulated sugar
1 tbsp cornstarch
1 tsp white vinegar
3 tbsp black sesame seeds
2 tbsp black sesame paste
5 medium firm but ripe Bosc pears
4 cups water
1 cup sugar (for poaching liquid)
10 whole cardamom pods, lightly crushed
2 whole star anise
1 whole cinnamon stick
1/2 medium lemon
16 oz mascarpone cheese
1 whole vanilla bean
1/2 cup heavy cream
1/4 cup powdered sugar
2 tbsp honey
1 tbsp toasted black sesame seeds (for garnish)
10 leaves fresh mint leaves
Instructions
- 1
Begin by preparing the black sesame pavlova. Preheat the oven to 275°F (135°C) and line a large baking sheet with parchment paper. Draw a 10-inch circle on the parchment paper, then flip it over.
- 2
In a clean, dry stand mixer bowl, add 6 large egg whites and 1/4 tsp cream of tartar. Begin whipping on medium speed until soft peaks form, about 3-4 minutes.
- 3
Gradually add 1 1/2 cups granulated sugar, one tablespoon at a time, while continuing to whip. Increase speed to high and whip until stiff, glossy peaks form and the sugar has dissolved (rub a small amount between your fingers - it shouldn't feel grainy), about 5-6 minutes.
- 4
In a small bowl, mix 1 tbsp cornstarch, 1 tsp white vinegar, and 2 tbsp black sesame paste until well combined. Gently fold this mixture into the meringue along with 2 tbsp of black sesame seeds using a rubber spatula.
- 5
Spoon the meringue onto the parchment paper, using the drawn circle as a guide. Form a slight depression in the center to hold the filling later. Use a spatula to create decorative ridges on the sides if desired.
- 6
Bake for 1 hour and 15 minutes, or until the exterior is crisp and dry. Turn off the oven and leave the pavlova inside with the door slightly ajar to cool completely, about 1 hour.
- 7
While the pavlova is baking, prepare the cardamom-poached pears. Peel 5 medium Bosc pears, leaving the stems intact. Cut a small slice from the bottom of each pear so they can stand upright.
- 8
In a large saucepan, combine 4 cups water, 1 cup sugar, 10 lightly crushed cardamom pods, 2 star anise, and 1 cinnamon stick. Cut half a lemon into slices and add to the poaching liquid.
- 9
Bring the poaching liquid to a simmer over medium heat, stirring until the sugar dissolves. Carefully add the pears and reduce heat to low. Simmer gently for 15-20 minutes, or until the pears are tender when pierced with a knife but still hold their shape.
- 10
Remove the pears from the poaching liquid and set aside to cool. Strain 1 cup of the poaching liquid and return it to the saucepan. Simmer until reduced to a syrupy consistency, about 15-20 minutes. Let cool completely.
- 11
For the vanilla bean mascarpone, split 1 vanilla bean lengthwise and scrape out the seeds. In a medium bowl, combine 16 oz mascarpone cheese, vanilla bean seeds, 1/4 cup powdered sugar, and 2 tbsp honey. Mix until smooth.
- 12
In a separate bowl, whip 1/2 cup heavy cream until soft peaks form. Gently fold the whipped cream into the mascarpone mixture until well incorporated.
- 13
To assemble, carefully transfer the cooled pavlova to a serving platter. Spread the vanilla bean mascarpone over the depression in the pavlova.
- 14
Slice the poached pears in half lengthwise and remove the cores. Place them decoratively on top of the mascarpone cream.
- 15
Drizzle the reduced poaching syrup over the pears and pavlova. Sprinkle with 1 tbsp toasted black sesame seeds and garnish with fresh mint leaves.
- 16
For the best texture contrast, serve within 1-2 hours of assembly.
Nutrition Information (per serving)
420
6g
58g
20g
Reviews (0)
No reviews yet
Be the first to review this recipe!