
Mastering Vietnamese Nước Màu: The Art of Savory Caramelization
Discover the science and technique behind Vietnamese nước màu (caramel sauce). Learn how to safely master deep caramelization for authentic savory braises.
Sofia Rossi
Kitchen Editor
August 23, 2026
6 min read
12 views
Walk into any kitchen where a Vietnamese claypot dish is simmering, and you will immediately notice a rich, complex aroma that is simultaneously sweet, bitter, and intensely savory. This distinctive profile does not come from a complex blend of spices, but from a single, foundational pantry ingredient: nước màu.
While Western cooking typically associates caramel with desserts, custards, and sweet treats, Vietnamese cuisine utilizes caramelization to build savory depth. Nước màu (literally translating to "coloring water") is a bittersweet, deeply caramelized sugar syrup that serves as the color and flavor foundation for legendary braised dishes (kho). Mastering this simple liquid caramel is one of the most transformative skills a home cook can acquire, unlocking authentic depth in Southeast Asian cooking.
The Meaning of Nước Màu
In Vietnamese, "nước" means water or liquid, and "màu" means color. Rather than relying on artificial food colorings or heavy soy sauces, traditional Vietnamese cooks use this natural, slow-caramelized sugar syrup to impart a glossy, mahogany hue and a complex bittersweet base to savory dishes.
The Science of Deep Caramelization
To understand nước màu, we must look at the science of sugar. When sucrose (granulated white sugar) is heated, it undergoes caramelization—a non-enzymatic browning reaction. As the temperature rises, water evaporates, and the sugar molecules break down, reforming into hundreds of new aromatic compounds.
In Western pastry, caramelization is stopped early, around 320°F to 350°F (160°C to 177°C), when the sugar is golden amber, buttery, and sweet. However, nước màu requires pushing past this sweet phase into the territory of controlled thermal decomposition, or pyrolysis.
By cooking the sugar to a much higher temperature—near 375°F to 400°F (190°C to 204°C)—you intentionally destroy the sweet sucrose molecules, replacing them with complex, pleasantly bitter compounds. This deep, dark caramel is not meant to be eaten on its own; instead, its bitterness acts as a structural counterpoint to the saltiness of fish sauce and the rich fats of pork belly or claypot fish.
“Nước màu is not about sweetness; it is about controlled bitterness. It provides the dark, smoky baseline that allows fish sauce, garlic, and black pepper to sing.”
Chef Nguyen ThanhHow to Make Nước Màu: Step-by-Step
Making nước màu requires patience, visual precision, and focus. Because the sugar transitions from perfectly bitter to burnt and acrid in a matter of seconds, you must give the pot your undivided attention.
Prepare Your Mise en Place
Measure out 1 cup of granulated white cane sugar (or coconut sugar) and have 1/2 cup of warm water or fresh coconut water standing by directly next to the stove. Once the caramel reaches its target color, you must add the liquid immediately to halt the cooking process.
Dissolve and Heat
Combine the sugar with 2 tablespoons of water in a small, heavy-bottomed saucepan. Place it over medium heat. Stir gently just until the sugar dissolves into a clear syrup, then brush down any crystals on the sides of the pan with a wet pastry brush. Do not stir again; stirring causes crystallization.
Observe the Color Shift
As the water evaporates, the syrup will begin to bubble vigorously. Watch the color transition closely: it will move from clear to pale yellow, to a warm amber, to a deep reddish-brown, and finally to a dark, smoky mahogany. The smoke point will be reached, and you will see thin wisps of smoke rising from the pan.
Quench and Stabilize
The moment the syrup turns a deep, dark coffee color (with red undertones when tilted), immediately remove the pan from the heat source. Slowly and carefully pour in the warm water or coconut water. It will sputter violently. Whisk rapidly until the water is fully incorporated and the caramel is smooth. Let it cool completely before bottling.
The Danger Zone
Molten sugar reaches temperatures of nearly 400°F (204°C) and sticks to skin instantly, causing severe burns. Always wear oven mitts, use a long-handled spoon or whisk, and keep children or pets out of the kitchen during this process. Never use cold water to quench the caramel; cold water causes the hot sugar to seize into a solid block and can trigger explosive splattering.
Recognizing the Perfect Batch
How do you know if you have successfully mastered the technique? The final product should be a glossy, free-pouring syrup with the consistency of maple syrup at room temperature.
If your nước màu is too sweet, you stopped the cooking process too early. It will make your savory braises taste like dessert. If it tastes intensely acrid, charcoal-like, and leaves a lingering, unpleasant burnt taste in the back of your throat, the sugar was scorched. Do not hesitate to discard a burnt batch and start over—even professional chefs occasionally burn a batch of caramel.
The Plate Test
Unsure if your sugar has caramelized dark enough? Keep a white ceramic plate in your freezer. During the final stages of cooking, drop a tiny droplet of the hot caramel onto the cold plate. It will cool instantly, allowing you to see the true color against the white background. You are looking for a dark, reddish-black tint, similar to soy sauce with red highlights.
Incorporating Nước Màu Into Your Cooking
Once you have bottled your homemade nước màu, it can be stored in a glass jar at room temperature indefinitely. Because of its high acidity and low water activity, it will not spoil.
To use it in your kitchen, remember that a little goes a long way. Typically, just one to two tablespoons are needed for an entire family-sized braise.
When preparing a traditional Vietnamese braise (kho), combine the nước màu with fish sauce, shallots, garlic, cracked black pepper, and your protein of choice (such as pork shoulder, chicken thighs, or firm-fleshed fish). As the dish simmers, the caramel emulsifies with the cooking fats and savory liquids, coating the proteins in a gorgeous, lacquer-like mahogany glaze that is deeply savory, mildly sweet, and beautifully balanced.
By mastering this single technique of controlled caramelization, you gain a foundational tool that elevates your understanding of flavor balance, heat control, and traditional Vietnamese culinary arts.
Try This Recipe
Now that you've learned about mastering vietnamese nước màu: the art of savory caramelization, put your knowledge into practice with this recipe:
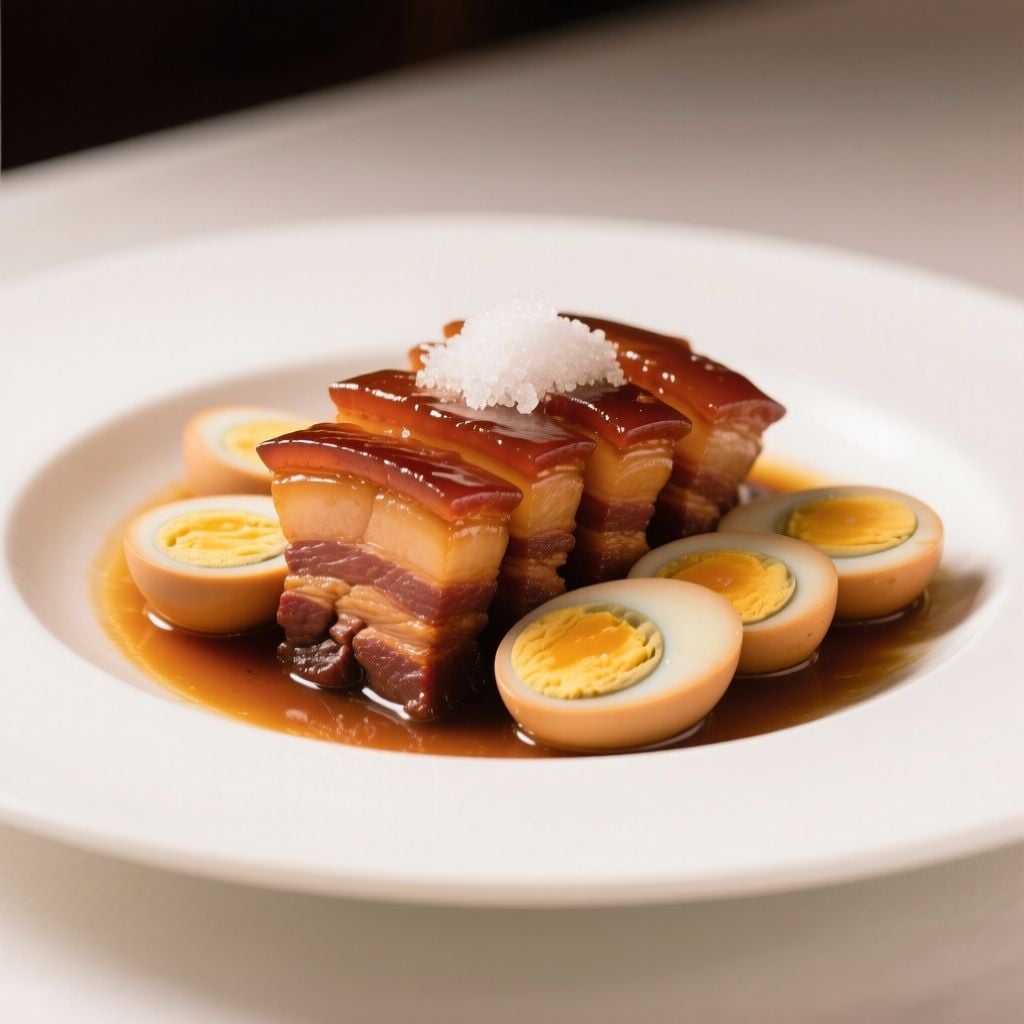
Thịt Kho Tàu (Classic Vietnamese Caramelized Pork Belly with Eggs)
75min
4
View Full Recipe →
Ready to simplify your meal planning?
Let OttoChef AI create personalized meal plans for your family — free to use, no credit card.