Mastering the Art of Creative, Non-Sandwich Lunchboxes
Tired of soggy sandwiches? Learn the techniques of modular lunch packing, temperature control, and ingredient selection to elevate your family's midday meal.
Marcus Rivera
Culinary Editor
June 16, 2026
5 min read
Packing a daily lunch often feels like a repetitive chore, leading many home cooks to rely on the standard sandwich as a default. While a well-made sandwich has its place, the physical constraints of a lunchbox—time, temperature, and moisture—often turn bread-based meals into a disappointing, soggy experience by noon. Elevating the lunchbox requires a shift in perspective: instead of thinking about recipes, focus on the structural integrity of ingredients and the mechanics of food storage. By understanding how different components interact over several hours, you can create varied, nutritious, and appetizing meals that survive the commute.
The foundation of a successful non-sandwich lunch is the modular approach. This technique involves preparing distinct components that retain their texture and flavor when stored together or in separate compartments. This method draws inspiration from global traditions like the Japanese Bento or the Indian Tiffin, where variety and balance are prioritized over a single large main item.
The Bento Balance
Traditional Japanese bento boxes often follow a specific ratio to ensure nutritional balance and visual appeal: four parts carbohydrates (like rice or grains), three parts protein, two parts vegetables, and one part pickled item or fruit for a hit of acidity and sweetness.
To move away from sandwiches, start by exploring grain bases. Unlike bread, which absorbs moisture from fillings and becomes mushy, hearty grains like farro, quinoa, or brown rice maintain their structure even when lightly dressed. These grains act as a sponge for flavor without losing their 'toothsome' quality. When using grains, the technique is to undercook them slightly—al dente—as they will continue to hydrate from the moisture in the vegetables and dressing packed alongside them.
The Cooling Rule
Always allow cooked components, such as roasted chicken or steamed grains, to reach room temperature before sealing the lunchbox lid. Sealing hot food creates steam, which condenses into water droplets, leading to soggy textures and potential food safety issues.
One of the most effective techniques for preserving freshness is 'Vertical Layering,' most commonly seen in jar-style salads. This method uses physics to keep delicate ingredients away from moisture until the moment of consumption.
The Dressing Base
Place your vinaigrette or sauce at the very bottom of the container. This ensures it doesn't touch the absorbent ingredients prematurely.
The Barrier Layer
Add dense, non-absorbent vegetables like chickpeas, carrots, or cucumbers directly on top of the dressing. These ingredients can sit in the liquid without losing their crunch.
The Delicate Components
Layer your proteins, grains, and finally, your leafy greens or soft herbs at the top. The 'barrier' layer protects these items from the dressing during transit.
Temperature control is another critical factor in lunchbox success. Many home cooks struggle with the transition from a hot kitchen to a cold lunchbox. While insulated thermoses are excellent for soups and stews, they can also be used for 'dry' hot meals like grain bowls or pasta. To maximize heat retention, prime your insulated container by filling it with boiling water for five minutes before emptying and adding your hot food.
"A lunchbox is not just a container; it is a controlled environment where moisture and temperature are your primary variables."
OttoChef Editorial TeamWhen considering proteins, look beyond deli meats. Cold roasted proteins, such as sliced steak, roasted chicken thighs, or firm tofu, offer superior texture and satiety. The key here is the 'Slicing Technique.' Slicing protein against the grain and into bite-sized pieces increases the surface area for seasoning and makes the meal easier to eat in a limited lunch break without needing a serrated knife.
Hydration Management
Avoid packing 'wet' items like cut tomatoes, juicy melon, or dressed slaw directly against dry items like crackers, nuts, or roasted chickpeas. Use small silicone cups or separate compartments to prevent moisture migration, which ruins the texture of crunchy components.
Cultural techniques can also provide inspiration for portable meals. For example, the Middle Eastern concept of 'Mezze'—a collection of small dishes like hummus, stuffed grape leaves, and olives—is perfectly suited for a lunchbox. These items are designed to be eaten at room temperature and offer a variety of flavors and textures that keep the palate engaged. Similarly, Mediterranean-style skewers allow for a deconstructed approach that children often find more engaging than a standard salad.
Finally, consider the role of acidity. A lunchbox meal that has been sitting for four hours can often taste 'flat.' Including a small wedge of lemon, a few pickled red onions, or a side of kimchi can brighten the entire meal. Acidity cuts through fats and refreshes the palate, making a room-temperature meal feel much more dynamic.
By mastering these structural techniques—layering, moisture management, and temperature priming—you move beyond the limitations of the sandwich. You gain the ability to provide your family with diverse, nutritious meals that are as enjoyable to eat as they were to prepare. Experiment with different grain bases and protein preparations, and remember that the best lunchbox is one that respects the science of food storage as much as the art of flavor.
Try This Recipe
Now that you've learned about lunchbox inspiration: beyond sandwiches, put your knowledge into practice with this recipe:
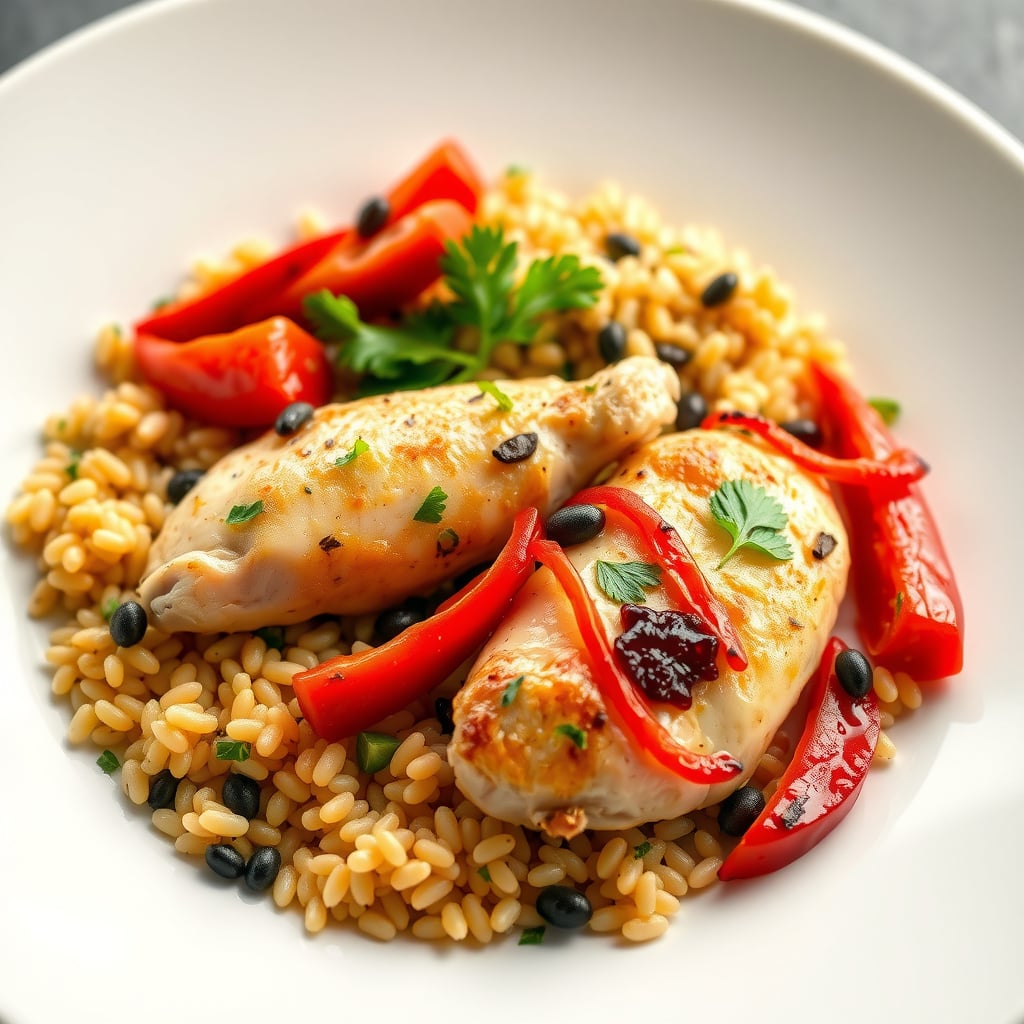
Mediterranean Farro & Lemon-Herb Chicken Bowls
50min
4
View Full Recipe →
Ready to simplify your meal planning?
Let OttoChef AI create personalized meal plans for your family in seconds.